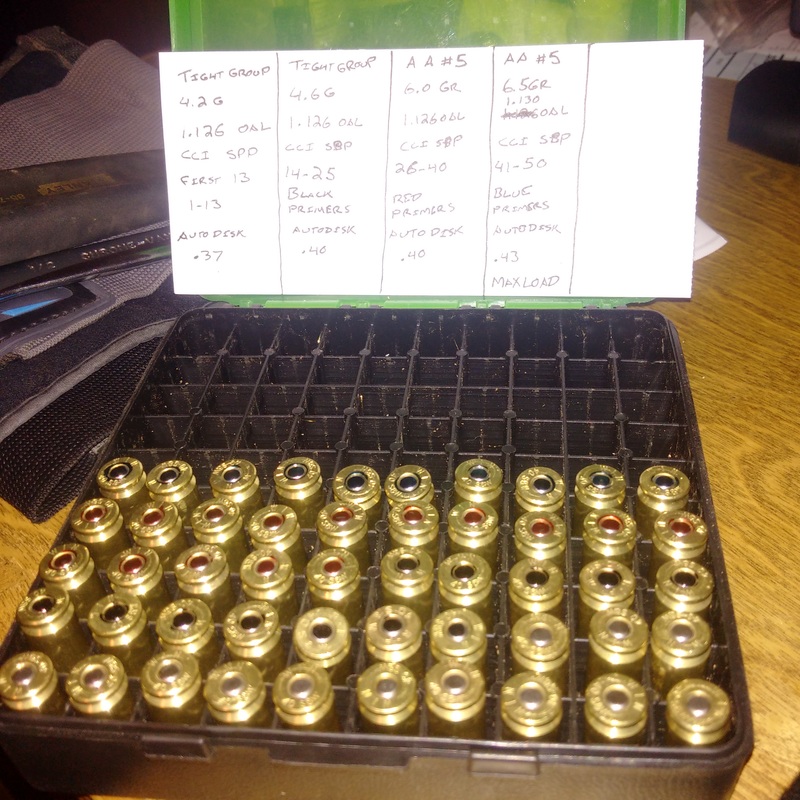
 I write a cheat sheet out for my loads, indicating the number and color of each load in the box. The color coded primers method has many benefits and few downsides. Perhaps the best benefit to color coding the primers is the ability to easily tell which load was in what brass after firing the rounds. This makes it less of an ordeal at the range, where you likely won't want to spend all of your time keeping your fired casings separate. This way, you can inspect your casings for pressure signs, bad seal, etc. and know which loads did what at a glance. The only additional supplies you will need to make this work are:
I always make an ordered list of my work up loads on a smaller piece of paper that will fit in my ammo box. This way I know every important detail of each load in case I find one I love or have issues with. I list all of the usual information, OAL, powder charge, bullet type, etc. and then for each load I label the number and pick a color. For instance, in the photo above, I loaded 13 rounds of ammo with 4.2 grains of Titegroup. I labeled that column 1-13, and left the primers natural. In the next group, I labeled them 14-25 with black primers. I find this method of organization leaves little room for error and makes keeping track of new loads much easier for me. This brings me to the method I used to use more often, and now only use for smaller runs of ammo. The "bag-n-tag" method. 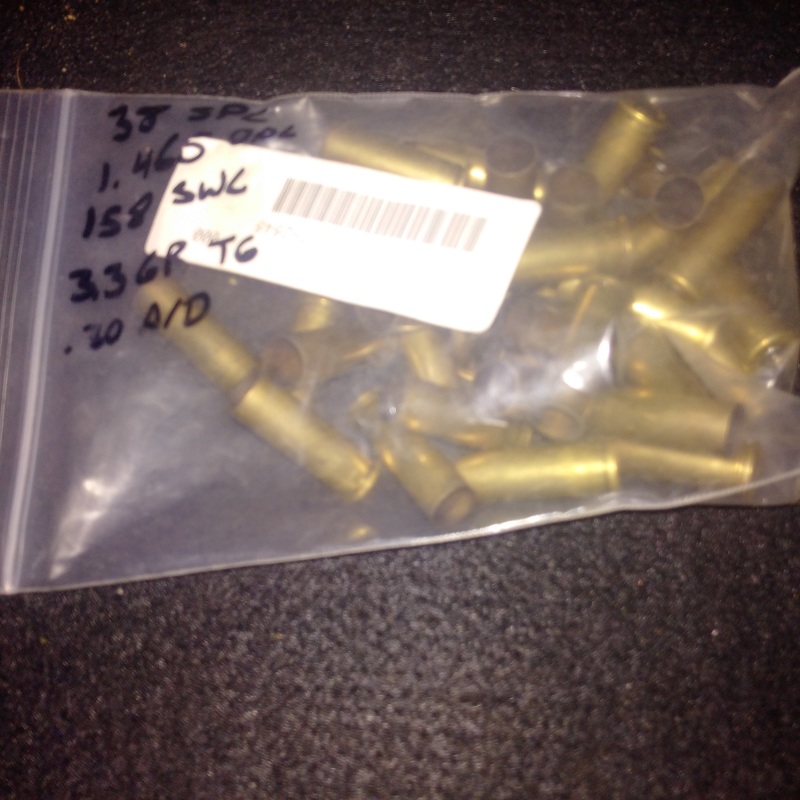 This way of organizing new loads works particularly well with revolver ammo. I used to put all of my new load work ups into these small zipper bags, slap a detailed label on them with a Sharpie, and call it good. However, with a semi-auto, it's not quite as easy to keep all the brass sorted out as well without taking more time to empty the brass catcher every group, or stop and pick up brass each time I try a new load. However, I do still use this method when I'm trying one or two new loads with my revolvers. It doesn't take much extra time to dump the brass from the cylinder back into the bag it came from. All in all, it doesn't really matter too much how you organize your work up loads. All that matters is that you do. Just keep in mind that when inspecting your fired brass, it is pretty important to know what load was in it! Thanks for stopping by and having a read. If you enjoyed the article, please hit the like and/or Tweet buttons bellow! Feel free to share with your friends as well!
0 Comments
Your comment will be posted after it is approved.
Leave a Reply. |
 RSS Feed
